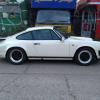
andy121 Posted December 7, 2018 Share Posted December 7, 2018 Not really 100% sure which area this project is suited to, so I will try here and hope I don't get told off. Project Background: I bought this car about 6 years ago and have never really come a conclusion of where I wanted to take it (or afford to) So I thought I would just spend a heap of money and time converting to stand alone management because I find that sort of thing interesting, I have the pleasure of working for a exhaust specialist, we are not your standard powerflow, although we do road cars, the bulk of our business comes from motorsport and inconel manifolds on World Rally X cars. I also built and run a Pro Drift Car for my boss. this luckily gives me some space, a good set of tools and some experience to work on the project. Engine wise my car is bone stock, other than the full exhaust system we made here. which features proper merge collectors and a x-pipe to give very good flow and I guess that my choice to upgrade the management will make good use of this. So far I have taken many things apart to work out exactly where I am going with this, My plans may seem a little obscure as they come from experience with high power Japanese/BMW stuff rather than Porsche, but every part of this project will have been well thought about ( I hope) and based on our experiences (I have some specialists on speed dial if I am stuck) I have included a picture of the drift cars engine bay (sorry its very dirty after a season on being beaten), so you can see what I am used to dealing with and why these air cooled Porsche engines are so obscure to me. If anyones actually interested its about 600bhp but with a ridiculous torque curve as we use nitrous to spool the turbo nice and quick. It also features the VAG coilpacks that I intend to use, I see people complain about them not dealing with heat very well. but after what we put them through heat is not the problem So the first part of my puzzle is the ECU, I have chosen to fit a Syvecs S6 Plus ecu, reasons being that Syvecs is very tunable (Syvecs is based on the Life Racing units used in LMP) and allows me to run 2x lambda probes with relative ease for a relatively good price. I will be using KA Sensors pressure transducers for anything pressure related as they are super reliable and accurate. Flying lead is a nice touch to crimp a DTM connector onto also. Here's the part that some will hate.... E-throttle. I can already hear cries of "why?" "its so slow" "It doesn't feel the same as a cable". The reason is that if setup correctly on a proper ECU (as above) it can be tuned to work better than a cable throttle and so well that you cant even tell its not a cable. It also does away with the linkage and all the idle control junk which makes things alot simpler. in my opinion anyway. I went for this specific unit because it has the same PCD mounting holes as the intake manifold, although it did need porting out, which retrospectively was more hassle than it could have been, luckily my colleague was avoiding his wife one night and was happy to take on that job. Also tapped a few holes in the rear for Vacuum reference ports as the OEM stuff is in the throttle body To make the e-throttle work, it needs a pedal and as everyone knows, these cars never had it from the factory so I had to get creative and create a hybrid that uses the porsche pedal to operate a heavily modified (chopped up) BMW E90 potentiometer and spring set on my aluminium bracket that now bolts into the space behind the pedal. It looks very overkill, but I never want to have to modify it or repair it. plus I had to make sure it wouldn't flex when I get excited with the right foot. Thats as far as I have got right now, I need to get the inlet manifolds cleaned out of swarf and old oil before I can reassemble them. Link to comment Share on other sites More sharing options...
Ian Comerford Posted December 7, 2018 Share Posted December 7, 2018 Wow, looking forward to seeing where this goes. Link to comment Share on other sites More sharing options...
Richard Bernau Posted December 10, 2018 Share Posted December 10, 2018 Would be good to see pics of the exhaust as well. Link to comment Share on other sites More sharing options...
andy121 Posted December 10, 2018 Author Share Posted December 10, 2018 I'll show you the exhaust when I drop the engine for the flywheel and cam since sensor. It's nothing particularly special but lots of porsche exhausts don't seem to promote flow very well for some reason. Link to comment Share on other sites More sharing options...
WP0ZZZ Posted December 10, 2018 Share Posted December 10, 2018 This looks like a very cool project! Have you changed any of the engine internals? How much power are you targeting? Link to comment Share on other sites More sharing options...
World Citizen Posted December 10, 2018 Share Posted December 10, 2018 😎 Link to comment Share on other sites More sharing options...
andy121 Posted December 11, 2018 Author Share Posted December 11, 2018 13 hours ago, WP0ZZZ said: This looks like a very cool project! Have you changed any of the engine internals? How much power are you targeting? nope engine is 100% stock as far as I know ( I have no reason to suspect otherwise), Power goal is to make as much as stock 😂 honestly I don't really have a goal because I have no idea, but I am interested to see how well I can make it work with a stock engine (maybe a set of cams at some point). Also I am poor and these engines are anything but cheap to extract power from, but it will be safe and hopefully the ECU and sensor will highlight the areas that need improvement to try and make it as good as it can be. I agree its abit of an odd project thats not the usual way people go about these engine, but it appeals to me and I really like the car 😉 Link to comment Share on other sites More sharing options...
Richard Bernau Posted December 11, 2018 Share Posted December 11, 2018 If otherwise healthy, you should target c.250hp. Given experience from other chip and exhaust tuned cars, that would be reasonable. Are you ditching the barn door air flow meter and going either mass air flow or throttle position/Alpha N? Link to comment Share on other sites More sharing options...
oliverjamesthomas Posted December 11, 2018 Share Posted December 11, 2018 Nice to see Syvecs being used. I have one in a non-Porsche application and it truly is a fantastic piece of kit. Interesting project! Link to comment Share on other sites More sharing options...
andy121 Posted December 11, 2018 Author Share Posted December 11, 2018 6 hours ago, Richard Bernau said: If otherwise healthy, you should target c.250hp. Given experience from other chip and exhaust tuned cars, that would be reasonable. Are you ditching the barn door air flow meter and going either mass air flow or throttle position/Alpha N? Sounds a reasonable goal, Yeah that horrendous OEM maf has been ditched, I'm actually going to be using a speed density tuning strategy utilising a 2bar MAP sensor and inlet air temp sensor. I did think about using a MAF strategy based on a modern MAF but decided to stick to what I know best in the speed density method. 3 hours ago, oliverjamesthomas said: Nice to see Syvecs being used. I have one in a non-Porsche application and it truly is a fantastic piece of kit. Interesting project! They are very very good but not the easiest to use for a beginner. I nearly went with Link actually to make life easier as I'm much more experienced with their software but glad I decided on Syvecs in the end. Link to comment Share on other sites More sharing options...
oliverjamesthomas Posted December 11, 2018 Share Posted December 11, 2018 I ran a Link G4 prior to switching to Syvecs. Very good value I thought, but the Syvecs is a whole different level. You made the right move and the chaps behind Syvecs are very knowledgeable and helpful. Thankfully I have a cracking guy to map it, so I don’t need to understand it too much. Give me carburettors any day 😂 Link to comment Share on other sites More sharing options...
andy121 Posted January 17, 2019 Author Share Posted January 17, 2019 Progress is very slow sadly as I don't have alot of time to work on it. But some progress has been made nether the less. I dropped the engine so that I can change the flywheel, which is a TTV item, however I specified it be 60-2 teeth rather the their standard 36-1 teeth, I have only mounted it check fitment, but will mount it properly on new bolts asap. I was planning on using the 964/993 crank sensor, however I think the 3.2 item will do the job, and can always be changed later if its no good. Next stage was to tackle the Cam sync setup which is required for the sequential ignition/injection setup I will be running, now annoyingly along with the tinware having evaporated some previous person has crossthreaded the bolts that I need to use for the sensor, luckily 1 did come out, which made drilling and taping the other 2 easier, also there was quite alot of corrosion to the head which resulted in having to carefully flatten the mounting face back so that I can actually get a seal (and it to align straight) you an just see the reminants in the below picture. Drilling and taping the camshaft was interesting also, I have never done that before, and i was quite please that half of my colleagues prized M5 tap is not a permanent feature in my cam shaft. I did look at other options such as the Rasant products distributor replacement, and also making my own from the stock distributor, but I wanted the neatest (aesthetically) solution, and what better way than to hide it down the back of the engine. and with the cap and sensor fitted Again for neatness I need to use High Impedance injectors with my ECU and rather than using a ballast pack to make the OEM injectors compatible I decided to upgrade to this more modern unit. These are refurbed and flowmatched, and flow 314cc (plenty) as well as having a better spray pattern from the use of 4 holes instead of 1. Plus cheaper that the OEM I decided to fit a Fuel Pressure regulator so that I can alter the fuel pressure to get the setup right, and as we are a big Turbosmart dealer what better option that the FPR1200 which uses AN-6 fittings, and with adaptors suits the OEM rails/lines which are in good condition currently. with the throttle body mounted, I have refitted half the inlet manifold Next up I need to get the other side done, as well as all the fuel lines. Link to comment Share on other sites More sharing options...
petesc30 Posted January 17, 2019 Share Posted January 17, 2019 watching with intrest,looks tidy install.whos vvt for the flywheel? cheers pete Link to comment Share on other sites More sharing options...
andy121 Posted January 17, 2019 Author Share Posted January 17, 2019 1 hour ago, petesc30 said: watching with intrest,looks tidy install.whos vvt for the flywheel? cheers pete its this product, I just asked to make it 60-2 - http://ttvracing.com/products/?manufacturers=porsche&engine=porsche-911-carrera-84-89&type=flywheels Link to comment Share on other sites More sharing options...
mikedsilva Posted February 20, 2022 Share Posted February 20, 2022 ah, what happened to this project? Link to comment Share on other sites More sharing options...

Recommended Posts
Create an account or sign in to comment
You need to be a member in order to leave a comment
Create an account
Sign up for a new account in our community. It's easy!
Register a new accountSign in
Already have an account? Sign in here.
Sign In Now